Creating An API Wrapper With AWS Lambda And API Gateway
I recently had a client who needed to call out to an API through some client-side Javascript. The problem was that to do make the call we needed to pass along the API key for the request, and embedding that in the client-side code would expose the key so that anyone could make the requests. While this was an unlikely event, it was clearly not good practice, and the API explicitly outlined this as a violation of the TOS.
So, what do? The best answer was to create an API wrapper that could only be called from the domain we wanted to deploy the code on - by all means, this is a weak security solution, and header origin domains can be spoofed, but this solution at least made it somewhat cumbersome to reuse our API wrapper outside of the site. Also, the API we were using wasn’t mission critical, so even someone took advantage of our setup and made extra calls, we wouldn’t be sunk and would likely know this had happened.
I had to amalgamate a lot of source material to make sense of creating this solution and I thought it might be good to put all of that documentation in one spot - here!
Setup
First, you’ll need an AWS account so you can create the fun Lambda and API Gateway stuff.
Next, we’re going to pretend that we’ve been given an API key to a service, and that we want to protect that key. The service we’ll use is the Open Air Quality API, which doesn’t require an API key, but again, we’ll pretend it does.
Creating the Lambda shell
- Once logged into AWS, go to Lambda and then click ‘Create a Lambda Function.’
- Next, click ‘Blank Function.’
- You should now be in the ‘Configure triggers’ section. Just click ‘Next’ as we will set this up later.
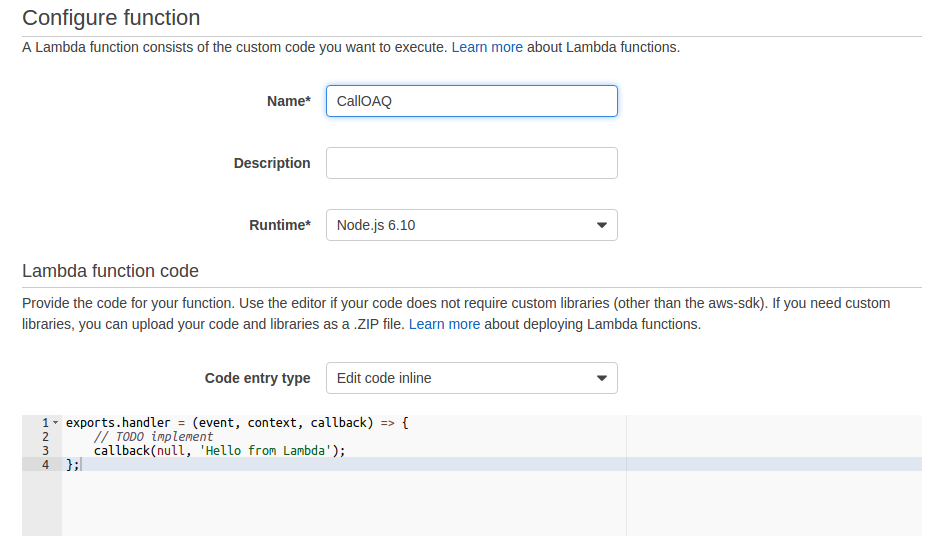
- Now you are in the ‘Configure function’ section. The fun begins.
Configuring the Lambda Function
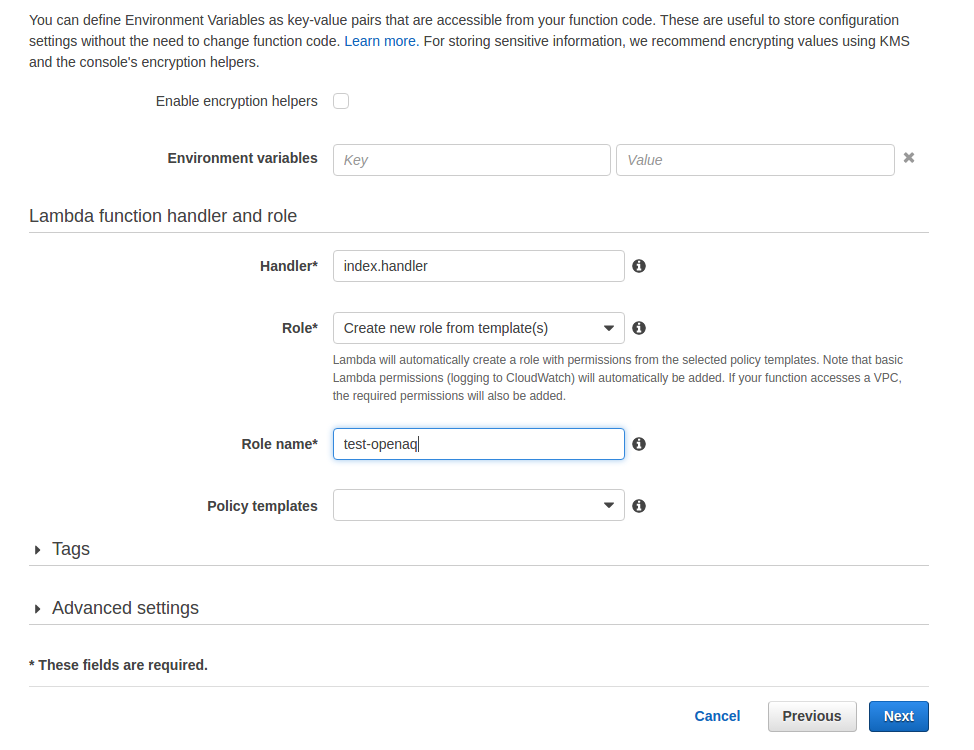
First, let’s give the function a name and call it to make sure we’re working. I’m going to call mine ‘CallOAQ.’ Then, let’s select for Role ‘Create a new roles from template(s).’ Give it another name, like ‘test-openaq.’
Click ‘Next’ and then ‘Create Function.’ After a couple of seconds, you’ll be taken to a screen that looks like this.
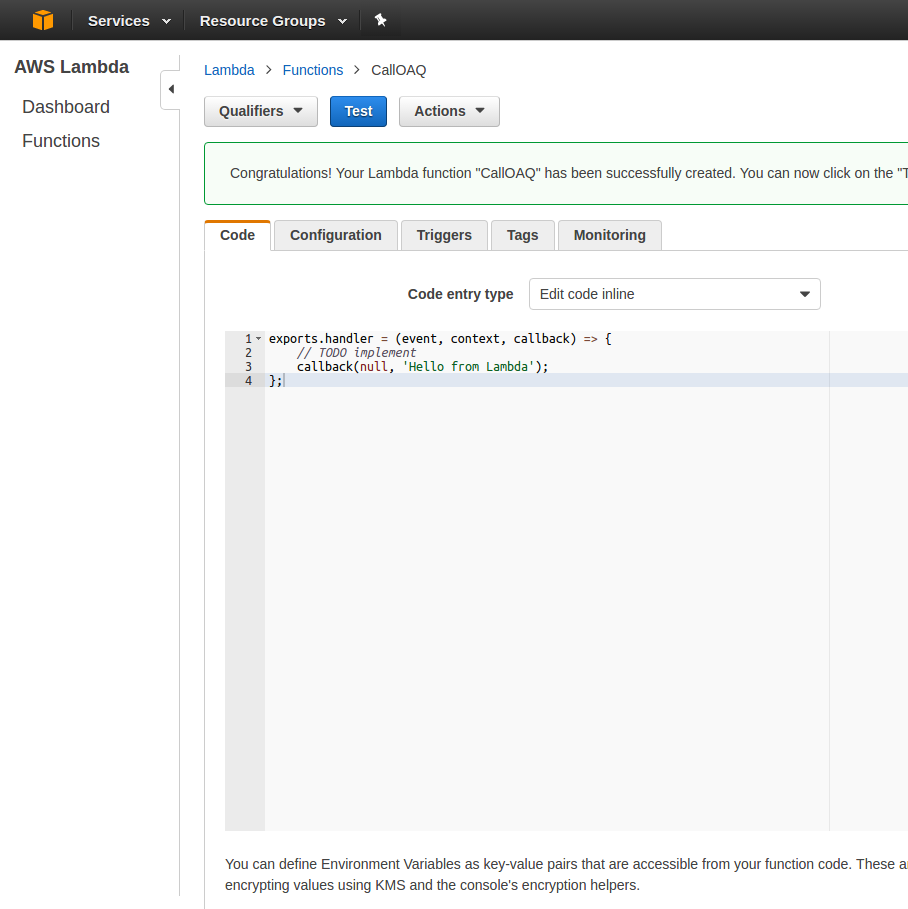
Click the ‘Test’ button. You’ll see some key-value pairs that can be configured for your testing, but let’s ignore those. For now, let’s click ‘Save and Test’ to see the ‘Hello from Lambda’ test.
Adding the Lambda logic
Ok, so we have a working ‘Hello World’ project. Now let’s add some actual logic.
exports.handler = (event, context, callback) => {
    var https = require('https');
    var callingDomain = "myCoolDomain.com";
    var userKey = "userKeysAreAwesome1234!@#$";
    var bodyContent = "";
    var validReq = true;

    function getData(address, query) {
        var url = (query) ?
                  address + "?user_key=" + userKey + query :
                  address + "?user_key=" + userKey;

        https.get(url, function(res) {
          // bad response, let's just return the statusMessage
          if(res.statusCode != 200) {
            bodyContent = res.statusMessage;
            callback(null, bodyContent);
          }
          res.on('data', function(chunk){
            bodyContent += chunk;
          });
          res.on('end', function(chunk){
            // we're done, let's return the bodyContent now
            callback(null, JSON.parse(bodyContent));
          });

        }).on('error', function(e) {
          callback(null, "Got error: " + e.message);
        });
    }

    if (event.origin.includes(callingDomain)) {
        if (!event.call) {
            validReq = false;
        }
        else if (event.call === "cities") {
           getData("https://api.openaq.org/v1/cities");
        }
        else if (event.call === "countries") {
           getData("https://api.openaq.org/v1/countries");
        }
    }
    else {
        validReq = false;
    }

    if (!validReq)
        callback(null, "You are not authorized to access this from " + event.source_ip + ":" + event.origin);

};
Let’s unwind what’s going on in the code for a moment.
- We have two possible calls, one to ‘cities’ and one to ‘countries.’ Again,
we’re pretending there is an API Key that we are appending in the
getDatafunction. getDataalso gives us aqueryparameter, so we could pass along something like&page=2to get the second page.- We’re filtering to see if the header origin includes the
callingDomain,which is where we are deploying our code to and trying to keep the API key secret on. - The
eventvariable is passed into thehandlerfunction from the API Gateway.
After pasting that code into the Lambda code entry area, click ‘Save.’ Next, click ‘Actions’ and then ‘Configure Test Event.’ Copy the following code into the code editing area.
{
  "source_ip": "123.45.67.89",
  "origin": "https://myCoolDomain.com",
  "call" : "cities"
}
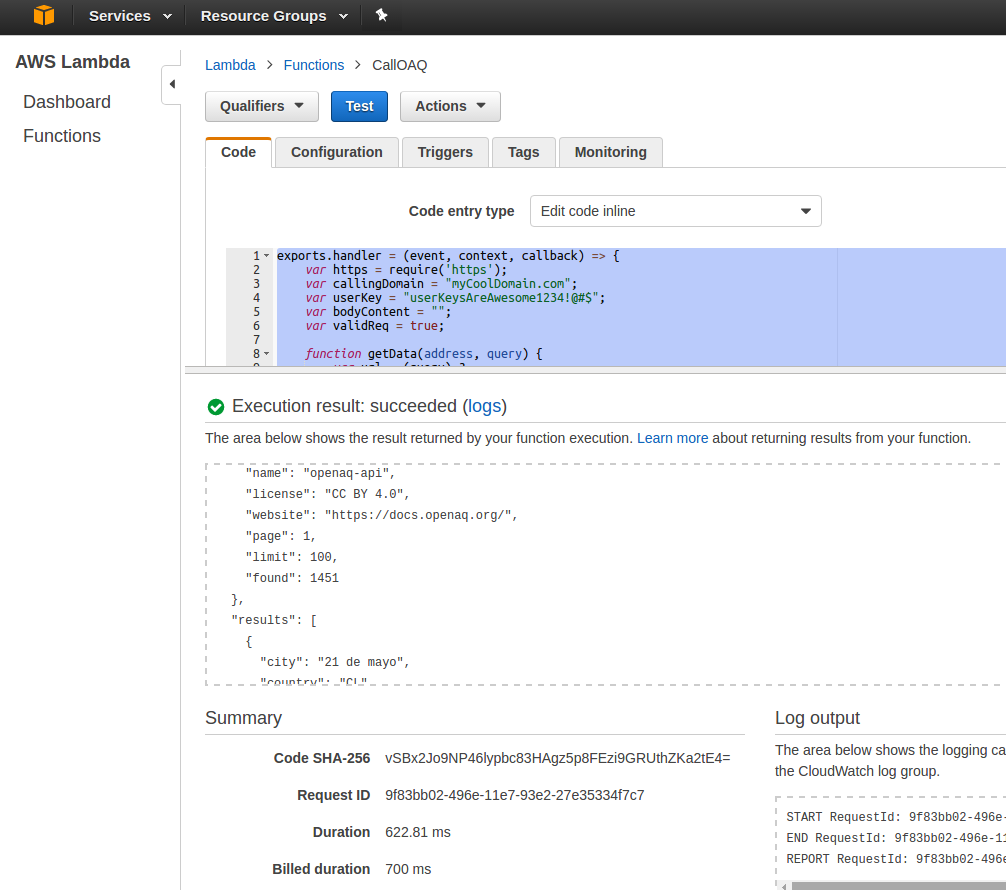
You can see that we are going to test make a cities call from the
myCoolDomain.com origin. Click ‘Save and Test’ and you should see results
similar to below.
Try changing the domain and observe the error results. And try changing the
call to something other than cities or countries.
Creating the API Gateway
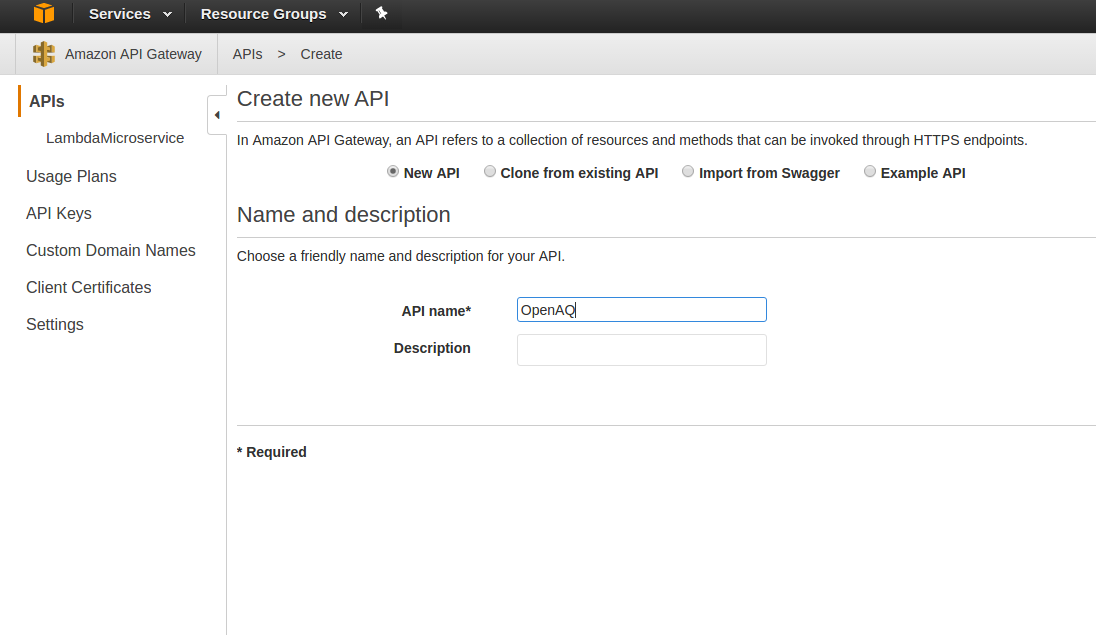
Now let’s start to create the API Gateway. Go to the API Gateway area in AWS. Then click ‘Create API.’ Click the ‘New API’ radio button and then let’s give it a name, like ‘OpenAQ.’ Tnen click ‘Create API.’
Creating API Resources
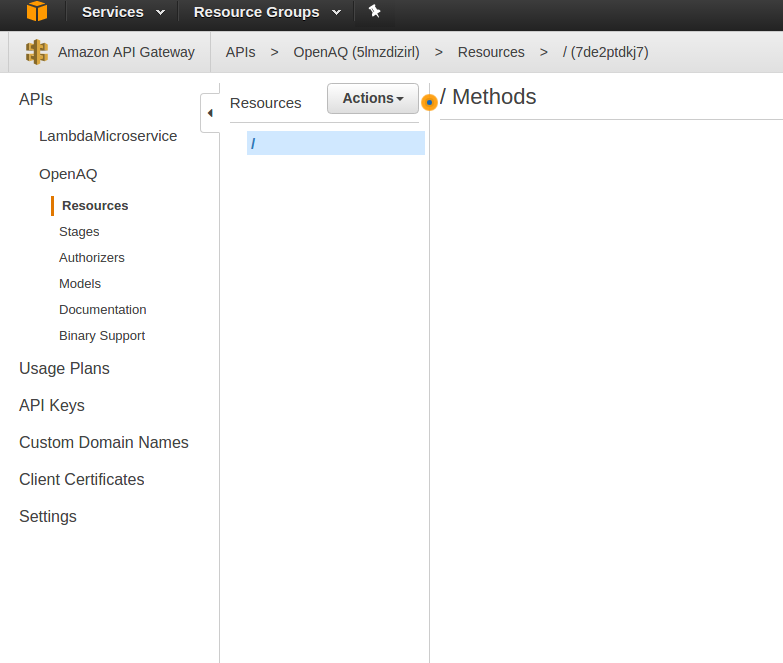
You’re now in the ‘Resources’ area of the OpenAQ gateway with no resources created yet. It looks like this.
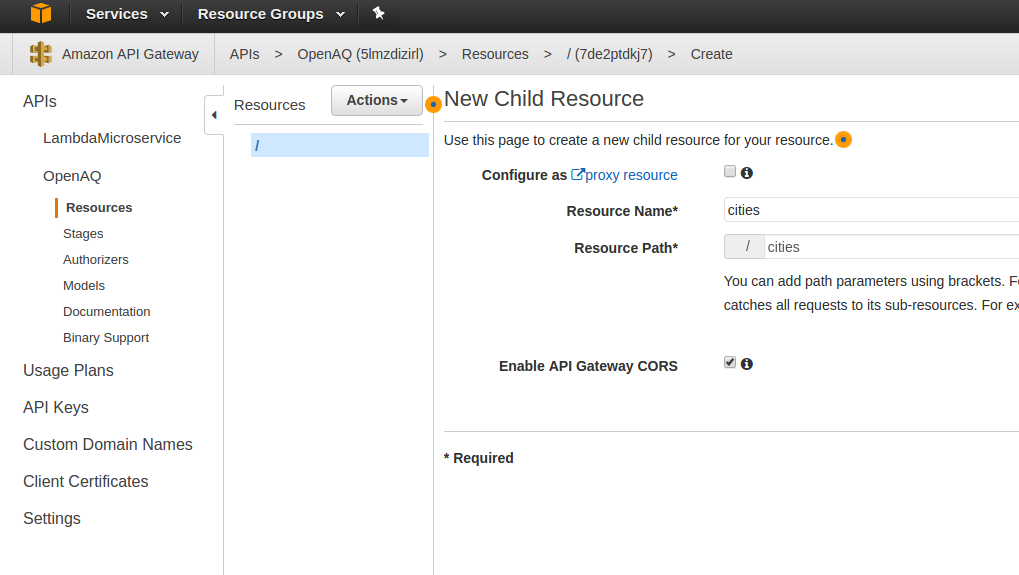
Now, click the ‘Actions’ button and then ‘Create Resource.’ Let’s name it cities and enable CORS so we can call it from out site (if needed).
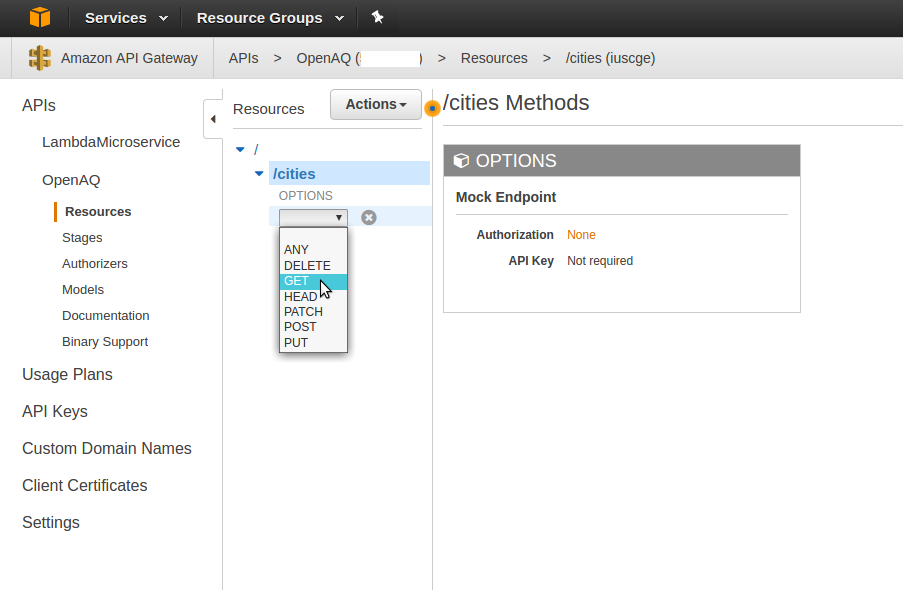
Click ‘Create Resource.’ Now with ‘cities’ selected, click ‘Actions’ and then ‘Create Method.’ You’ll be presented with a dropdown - select ‘GET.’
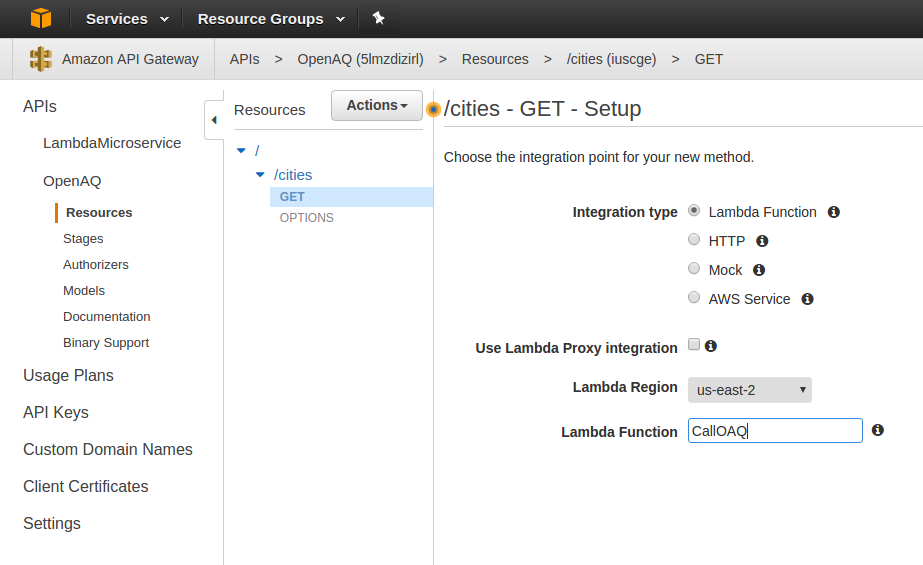
After clicking the checkmark to create the ‘GET’ method, select your Lambda Region, and then start typing in CallOAQ to specify the function we will call.
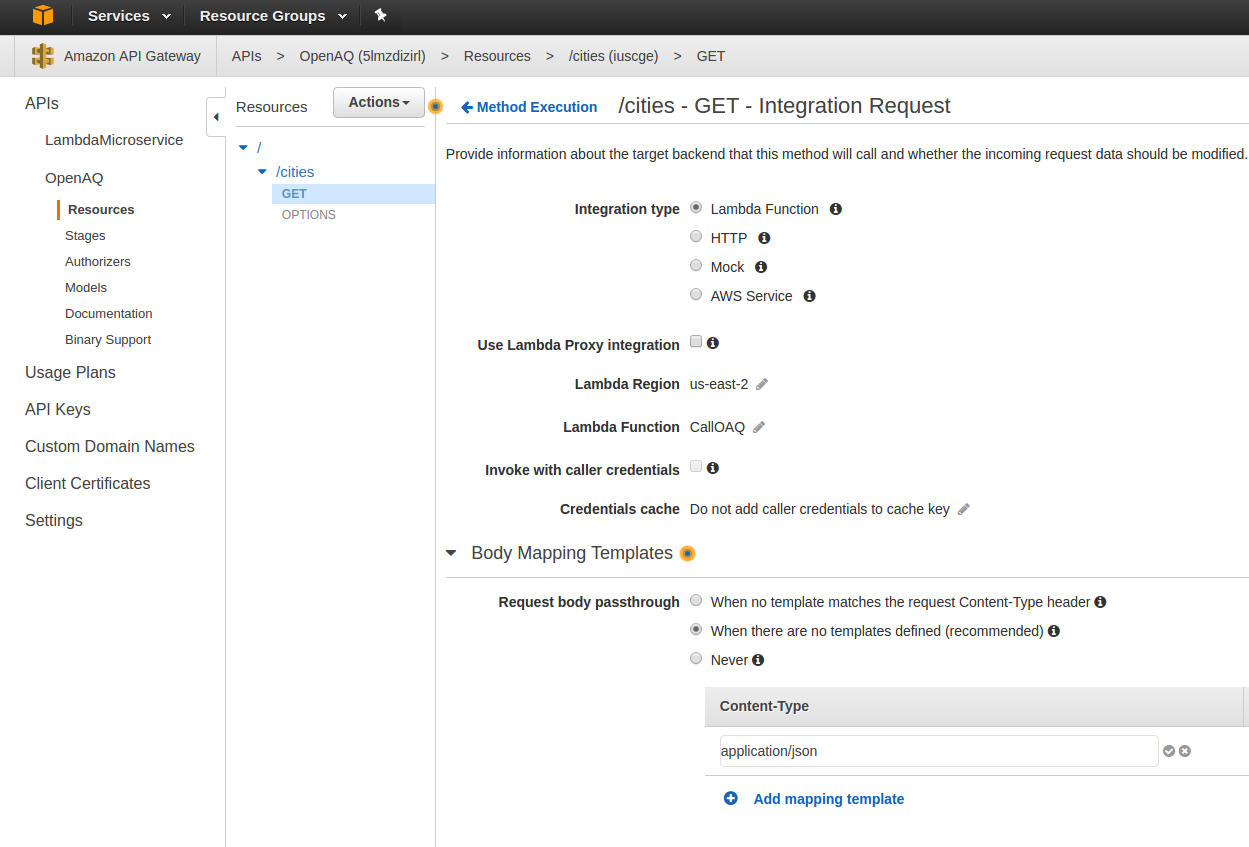
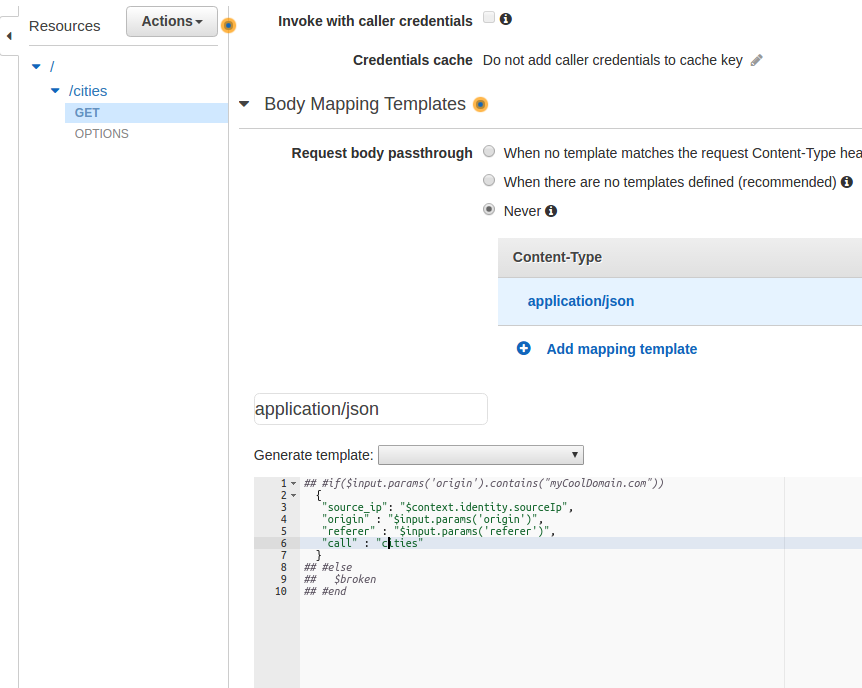
Click ‘Save,’ and then ‘OK’ at the prompt to give access to the function. Now, you’re taken to the ‘GET’ action of the ‘cities’ resource. Click on ‘Integration Request’ and then click ‘Body Mapping Templates.’ Click the ‘recommended’ option and then specify application/json as the Content-Type and click the little ‘checkmark’ next to it.
Paste the below json into the scripting area:
#if($input.params('origin').contains("myCoolDomain.com"))
  {
   "source_ip": "$context.identity.sourceIp",
   "origin" : "$input.params('origin')",
   "referer" : "$input.params('referer')",
   "call" : "cities"
  }
#else
  $broken
#end
What you can see is that we’re passing along the cities call, and also the origin, referer, and source IP. We are testing whether the origin is our domain here, and if it isn’t then we’re going to call the $broken variable. This variable is undefined and stops the script from calling the Lambda function. Now click ‘Save.’

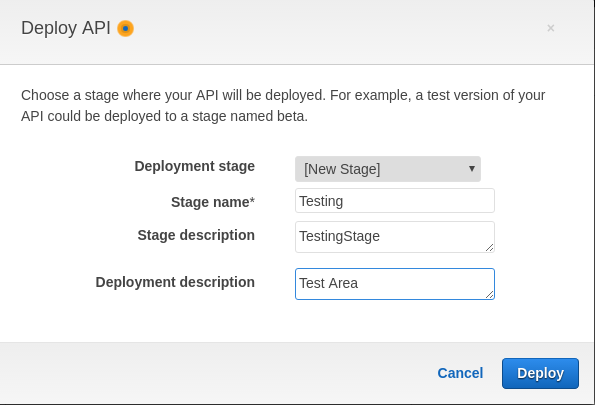
Now, click on ‘Actions’ and then ‘Deploy API.’ For Deployment Stage, select a new stage and give it the details for each input. Then Click ‘Deploy.’
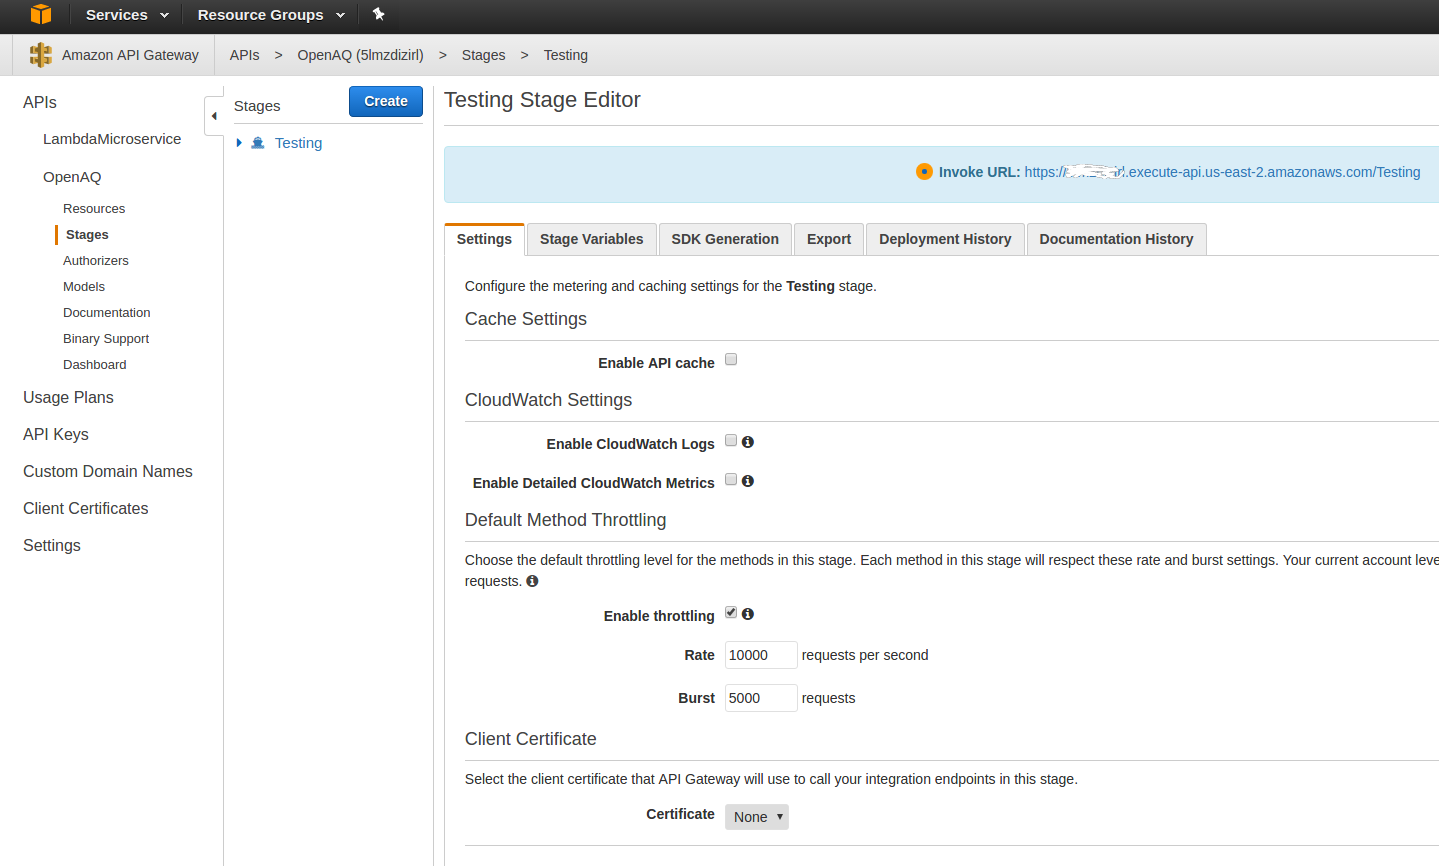
You should now have an API you can invoke from the URL at the top of the dashboard.
Testing
At this point, click on the ‘Resources’ option on your OpenAQ API, and click on the ‘GET’ method in the cities resources. Now click the ‘Test’ lightning bolt and then click Test.
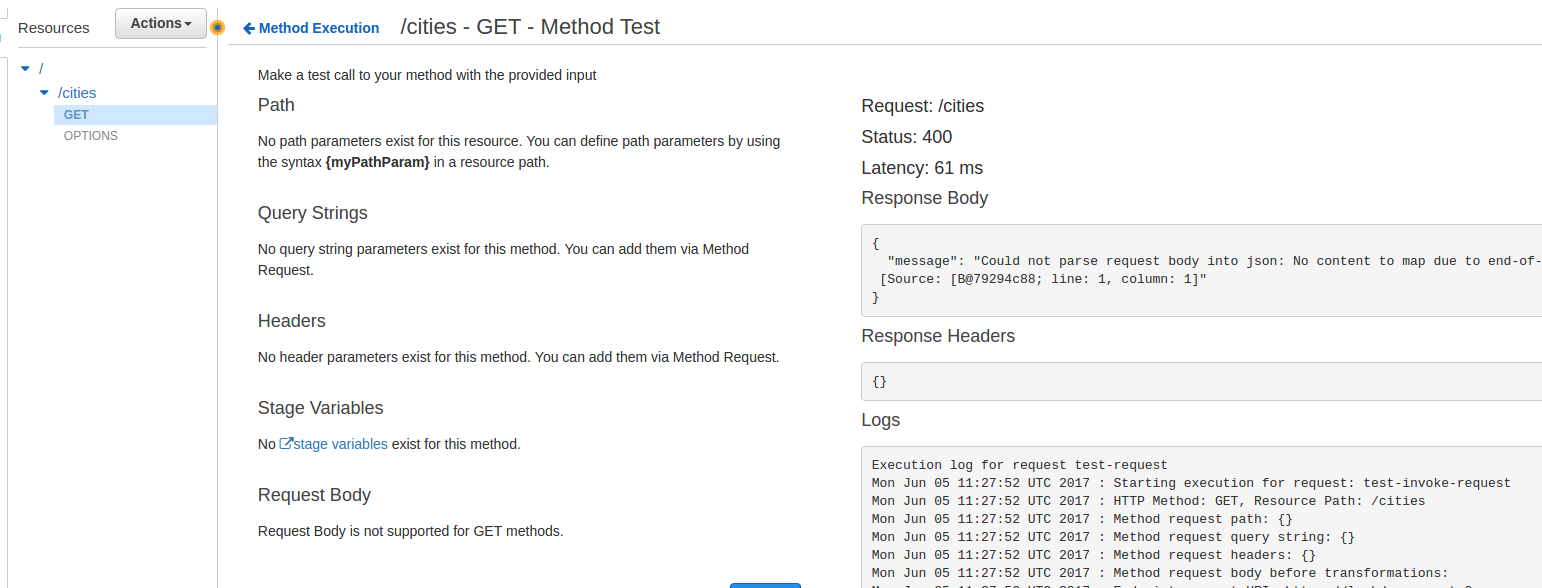
You will likely see this result, where the request body couldn’t be parsed into JSON. This is actually what we want, as our “callingDomain” isn’t “myCoolDomain.com”, so the request fails. Let’s go back to the Body Mapping Template and comment out that “security check.” Remember, we have to go back the “GET” and then Integration Request, then click Body Mapping Templates, then click the ‘application/json’ in ‘Content Type.’ Let’s comment out the checks.
## #if($input.params('origin').contains("myCoolDomain.com"))
  {
   "source_ip": "$context.identity.sourceIp",
   "origin" : "$input.params('origin')",
   "referer" : "$input.params('referer')",
   "call" : "cities"
  }
## #else
##   $broken
## #end
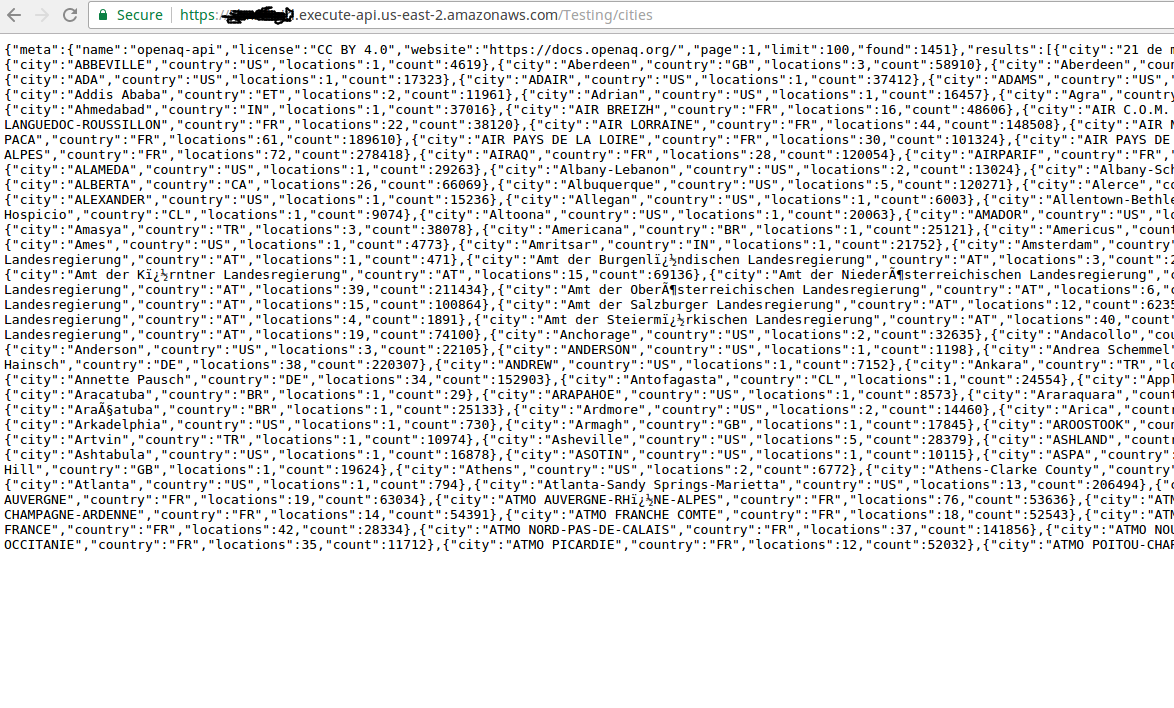
Once you’ve modified the Body Mapping Template, click Save, and let’s retest! Now you can see our Lambda function is rejecting the call since the origin isn’t correct. Yay, we’re functioning! Now if you go to your Invoke URL through the web browser you won’t see this change… that’s because the changes we have made in the API Gateway to the Body Mapping Template haven’t yet been deployed. Click the ‘Actions’ and then ‘Deploy API’ every time you want to push your new changes out the front facing Invoke URL. Once you do that should see something similar to what you see in the ‘Test’ area of the ‘GET’ request (https://myCustomAwsUrl.execute-api.us-east-2.amazonaws.com/Testing/cities is how my link looks since I added a ‘cities’ resource on the ‘Testing’ deployment).
Now, since you really just want to see this live, go ahead and return to your Lambda function and change line 32 to this:
//if (event.origin.includes(callingDomain))
if (true || event.origin.includes(callingDomain))
Now click save, and then make the call in your browser! It’ll look something like we expect!
Hopefully this was a helpful crash course, but it’s only meant to be just that! None of this tutorial has been security focused and is just meant to provide a glimpse into creating a quick and dirty API wrapper. YMMV.